wis2box services introduction
Introduction
In this session you will run the wis2box software that was pre-installed on your student VM using the test data configuration.
You will review and access the services provided by your wis2box: the MQTT broker and HTTP accessible services and view how the services work when manually ingesting some test-data.
Preparation
Login to your designated VM with your username and password.
Note
The latest wis2box-release 'wis2box-1.0b3' was pre-installed on your student VM using the release archive available on GitHub.
You can always find the latest 'wis2box-setup' archive at https://github.com/wmo-im/wis2box/releases
wis2box start and status
Navigate to the directory containing the wis2box software stack:
cd ~/wis2box-1.0b3
Start wis2box with the following command:
python3 wis2box-ctl.py start
Inspect the status with the following command:
python3 wis2box-ctl.py status
Repeat this command until all services are up and running.
Question
What services are running? Which ports are used for each service?
Note
wis2box runs as a set of Docker containers managed by docker-compose.
The services are defined in the various docker-compose*.yml which can be found in the ~/wis2box-1.0b3/ directory.
The script 'wis2box-ctl.py' is used to run the underlying Docker Compose commands that control the wis2box services.
wis2box UI
Open a web browser and visit the page http://<your-host>.
This is the default wis2box web application (running via the wis2box-ui container).
Click the "EXPLORE" option on http://<your-host>.
View latest data per station on the wis2box UI
Click on on a station in the station-list or hover your mouse over a station in the map to see the latest data for that station.
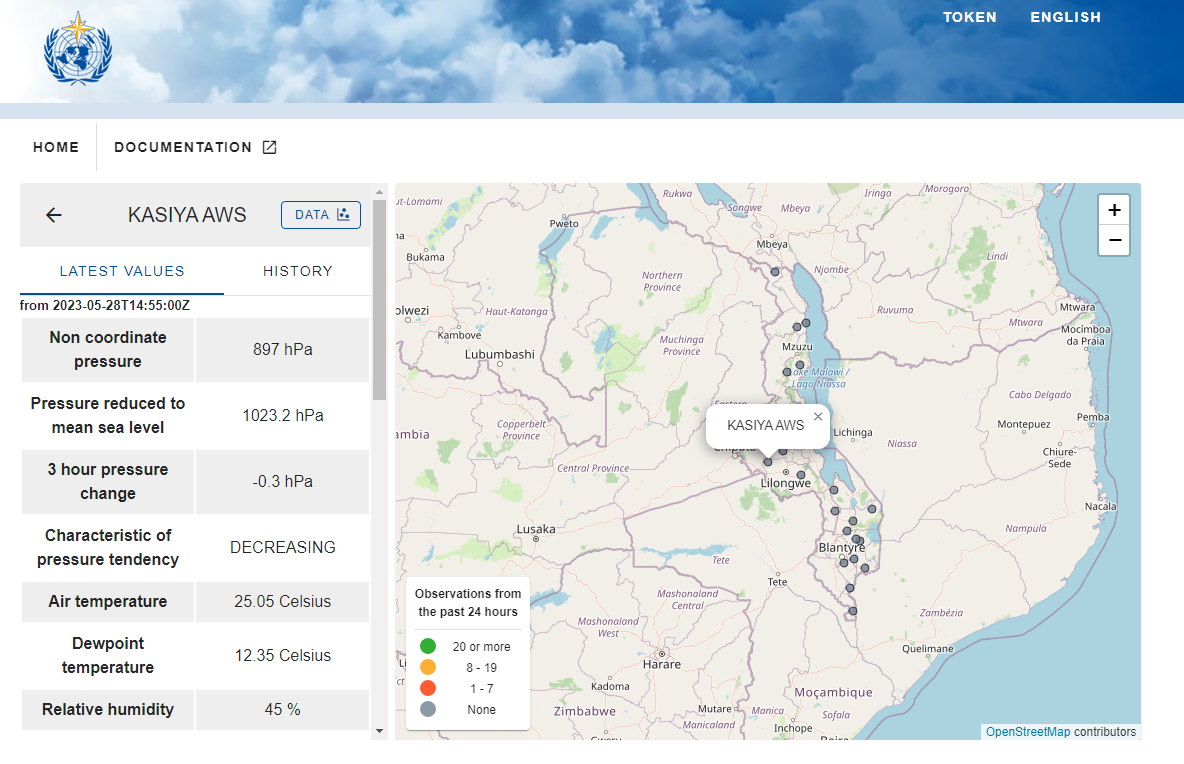
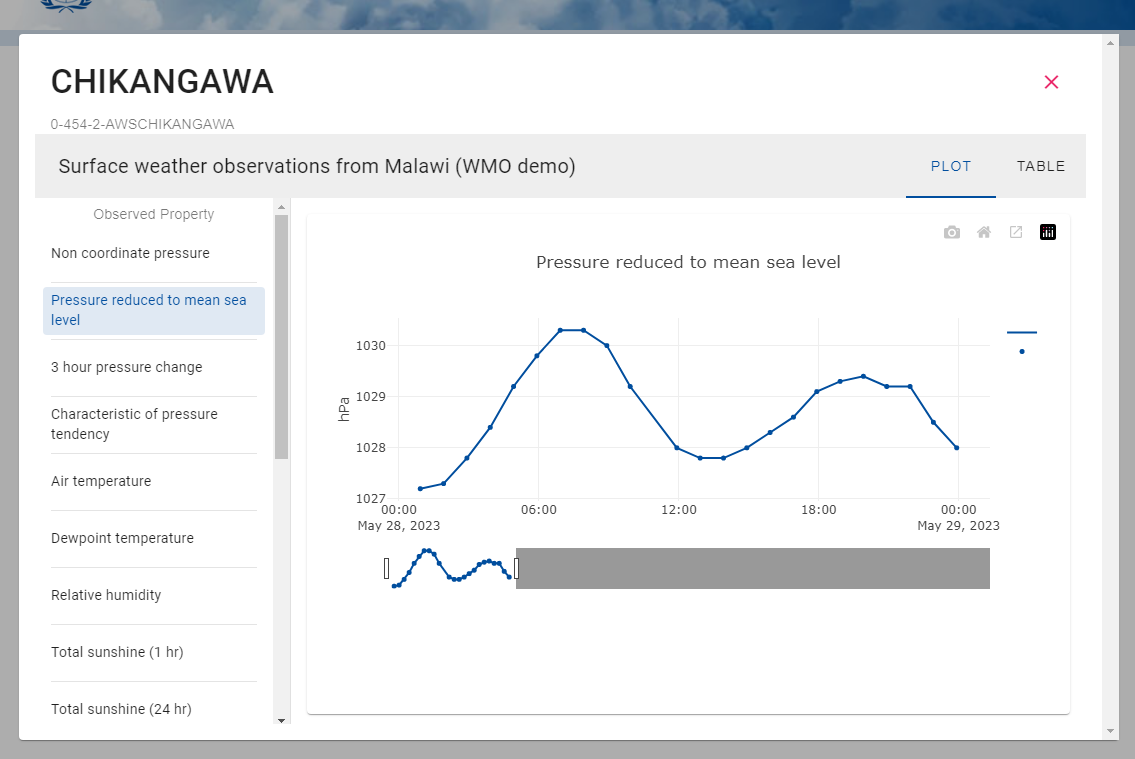
View data profile over time per measured variable
After selecting a station in the map, click on "data" and select a variable to see a graph of the measured variable over time.
Question
What is last timestamp in UTC for which the Malawi station "Bilira" received data?
wis2box API
Open a new tab and navigate to the page http://<your-host>/oapi.
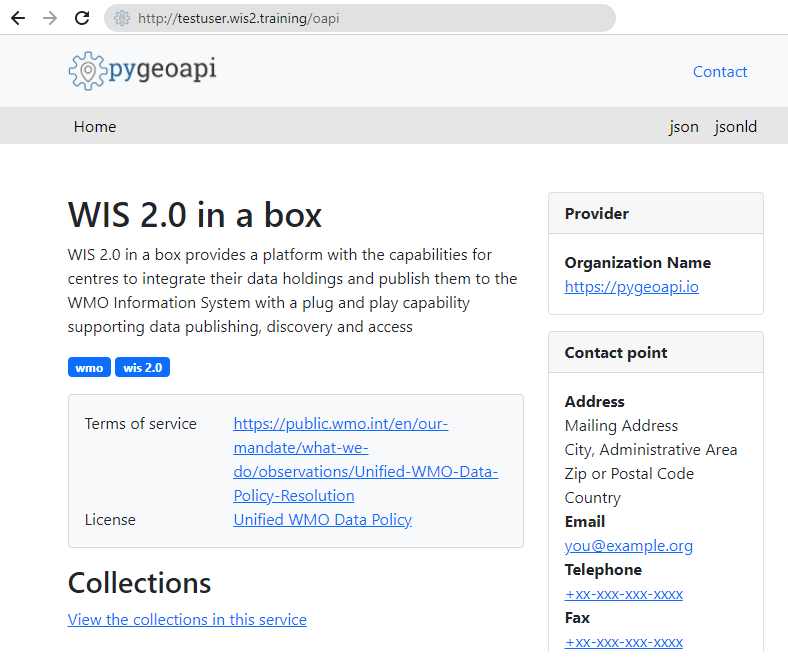
This is the wis2box API (running via the wis2box-api container).
To view collections currently published to the API, click View the collections in this service.
Question
What collections are currently available?
Question
How many data notifications have been published?
Question
How many stations are configured?
wis2box-broker
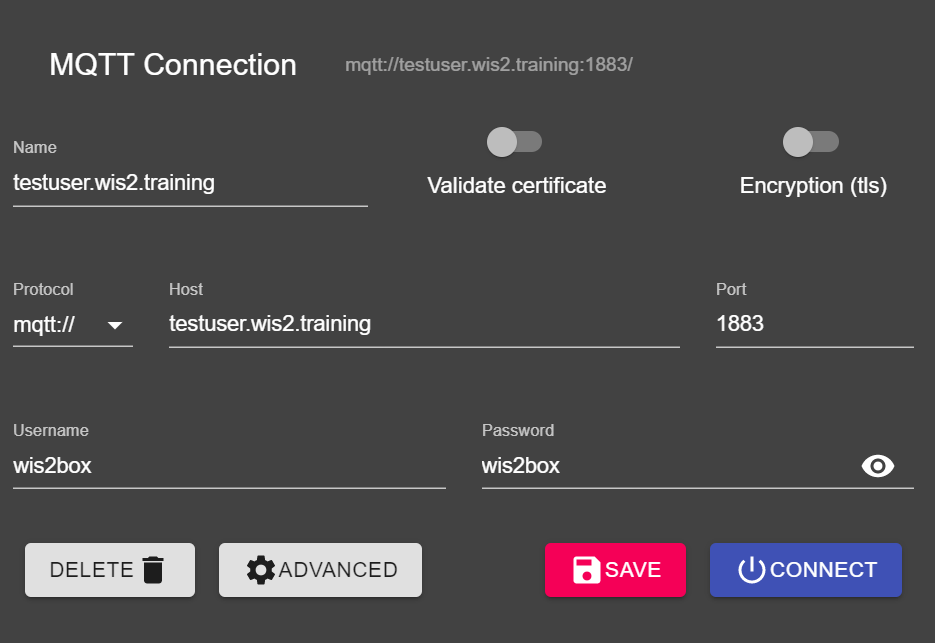
Open the MQTT Explorer on your computer and prepare a new connection to connect to your broker (running via the wis2box-broker container).
Use the following connection details:
- Protocol: mqtt://
- Host:
<your-host> - Port: 1883
- Username: wis2box
- Password: wis2box
- under 'ADVANCED', subscribe to the topics
$SYS/#andorigin/#
Make sure to click "SAVE" to store your connection details.
Once you are connected, you should see statistics being published by your broker on the $SYS topic.
Make sure MQTT Explorer is connected to your broker before proceeding to the next exercise:
publishing WIS2 data
To demonstrate how the wis2box can publish WIS2 data we will manually ingest some data from the command line:
In your SSH client window, ensure you are in the ~/wis2box-1.0b3 directory and login to the wis2box-management container as follows:
cd ~/wis2box-1.0b3/
python3 wis2box-ctl.py login
Note
This command is equivalent to docker exec -it wis2box-management /bin/bash, meaning that you have entered an interactive shell inside the wis2box-management container.
Run the following command to ingest some additional data for Malawi:
wis2box data ingest -th mwi.mwi_met_centre.data.core.weather.surface-based-observations.synop -p /data/wis2box/observations/malawi-new-data/
After the data ingestion ran successfully, you should be able to view new messages that have been published on your wis2box broker in MQTT Explorer.
Question
What is the topic used to publish notifications for new data? How many WIS2 data notifications have been published?
download data
What is the URL that allows you to download the published data in BUFR-format?
Copy and paste the URL in your browser to verify you can download the corresponding .bufr4 file.
Go back to your browser and visit the wis2box UI.
review new data
Find the stations for which you ingested new data and verify new data is available.
Conclusion
Congratulations!
In this practical session, you learned how to:
- start wis2box and check the status of its components
- ingest some data test observations
- access the wis2box UI, API, MinIO UI and Grafana dashboard